Crypto Wallet Setup
Crypto wallets are applications that provide a user interface to store, send, and receive cryptocurrency. This exercise is using MetaMask which is available for mobile and/or browser. MetaMask can be installed on multiple devices.
Pre-install Preparation
Before you start the installation, it's a good idea to prepare for creating an account on MetaMask and receiving the Secret Recovery Phrase (SRP), public key, and private key. Use a strong password for your metamask account and plan how you want to store the password, private key and the SRP. You'll be creating a password for the MetaMask extension. Extensions are isolated from the browser, so you won't be able to access the password from a browser password manager. You can store the password, phrase and private key in a cloud file. This is referred to as "hot" storage and is not as secure. The "cold" storage method is more secure: save the password, SRP, and private key to a zip drive or print it out and save the printed output in a secure place.
Because you can use the SRP to derive private keys, you only need to save the SRP and not the private key. It is much easier to recognize the SRP than the private key.
MetaMask Accounts and Keys
When you install MetaMask, it will create an account named Account 1 by default. It is associated with a public key. Remember that a single private key can generate multiple different public keys. Account 1 will have a public key that you can share. This is used as an address on a blockchain. You can rename Account 1, and it won't change the address. You can also add new accounts. Each new account will receive a new public key. All accounts in your wallet will share the same private key.
When you're learning it's helpful to use training tokens. It makes it more affordable to experiment without the possibility of losing money. You can also experiment with creating, renaming and deleting accounts in the wallet.
Install MetaMask as a Browser Extension
Navigate to the MetaMask download page. If you are using Chrome, there will be a blue button that you click labeled Install MetaMask for Chrome. This button will change depending on the browser you are working with. The images and notes for this exercise are based on installing the brower extension on Chrome.
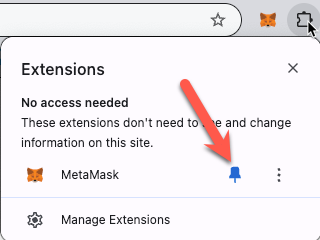
Once the extension is installed, you need to pin it to the address bar by clicking on the puzzle icon to the right of the address bar, and then clicking on the pushbutton pin.
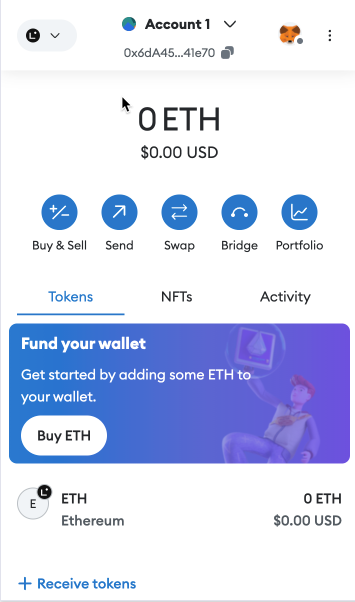
After you've pinned the extension to the address bar, you can click on the fox icon to open the wallet. The wallet application should look like the image shown below.
Configure the Wallet to Use a Test Network
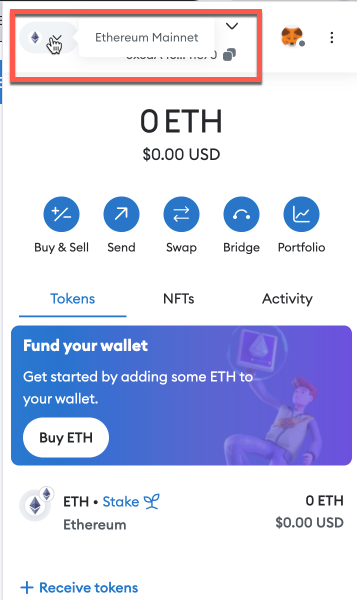
When you first open the wallet, you will see the default Account 1 for your account and a link to copy your public key. By default, you will be on the Ethereum Mainnet. For this exercise, you will configure the wallet to use the test network, Linea Sepolia. You can hover over the Ethereum icon in the upper left corner to see that the current network is Ethereum Mainnet. Notice that there is an arrow next to the icon. Once you've connected Linea Sepolia to the wallet, you'll come back and choose the Linea Sepolia network by clicking on the downward arrow.
Connect Linea Sepolia Network with Chainlist
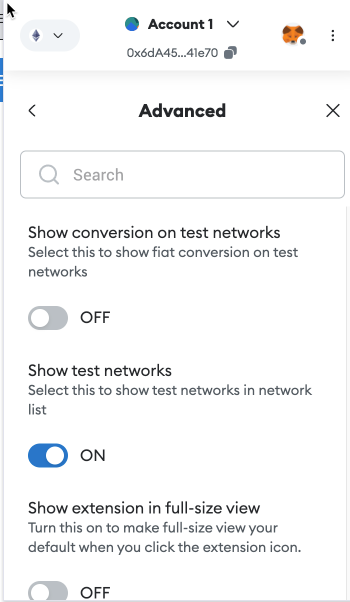
Modify Wallet Settings to Show test networks.
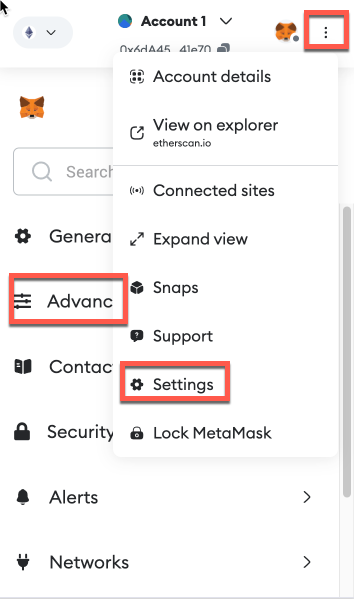
Start by opening the advanced settings on the wallet.
Click the on button for "Show test networks".
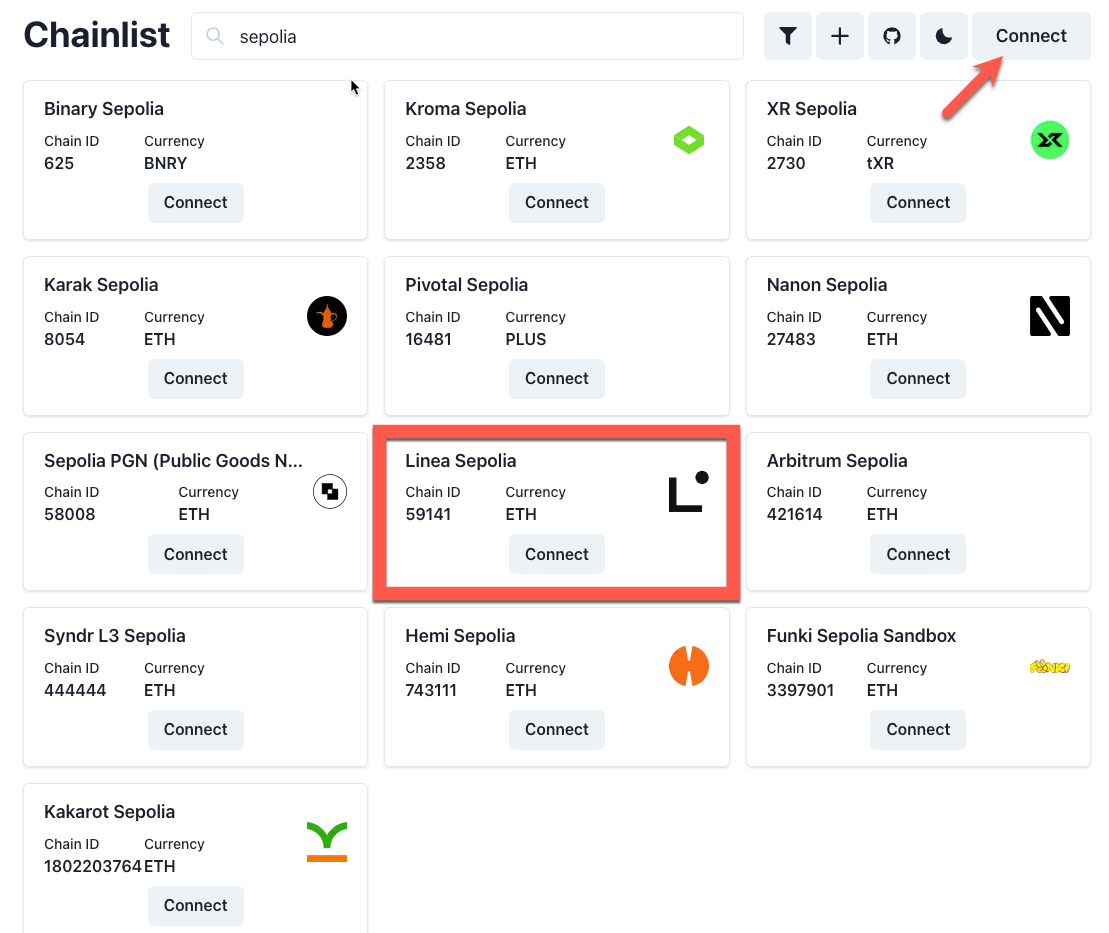
Connect Wallet to Chainlist
Navigate to Chainlist. Search for Sepolia. Click on the Connect button for Linea Sepolia.
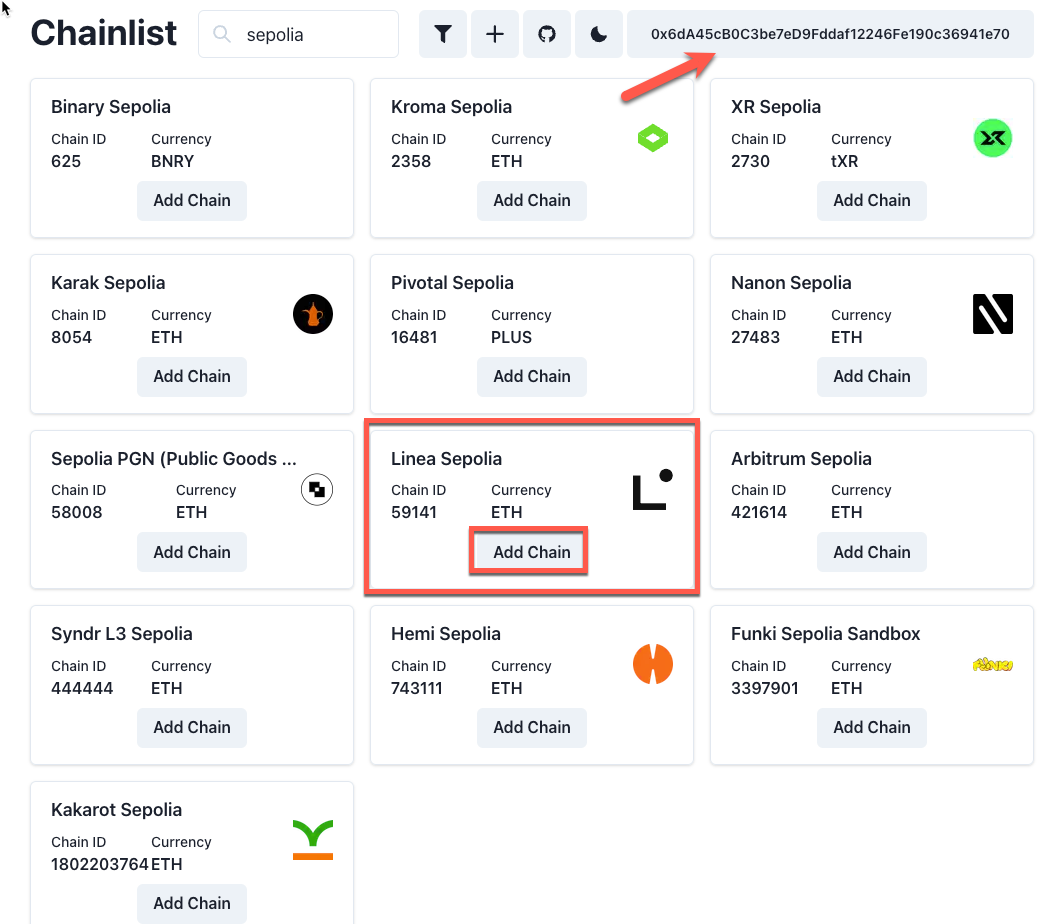
Add Chain
The first time you connect your wallet you will be asked for some authentication details. Once the wallet is connected, you'll see your public key in the upper right corner. The Connect buttons have changed to Add Chain. Click on the Add Chain button for Linea Sepolia to add this blockchain network to your wallet.
Select a Network
Return to the home screen on the wallet. Click on the downward arrow in the upper right to Select a network. You should see the Linea Sepolia network. Click on it to use it.
If you hover over the Linea token in the upper left corner, you can see that this account is connected to the Linea Sepolia network, and has 0 LineaETH. In the next section you'll add tokens to your wallet.
